Configuration
Two steps are required to configure a check.
1 - Check configuration -----------------------------------------------------------------------------
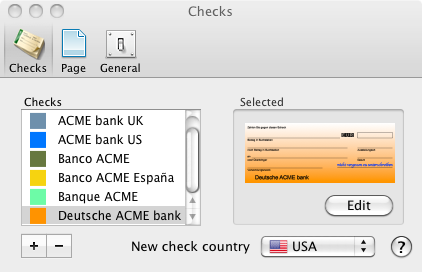
Click "Preferences > Check"
Select a check and click "Edit" or
Select a country and click "+" to create a check
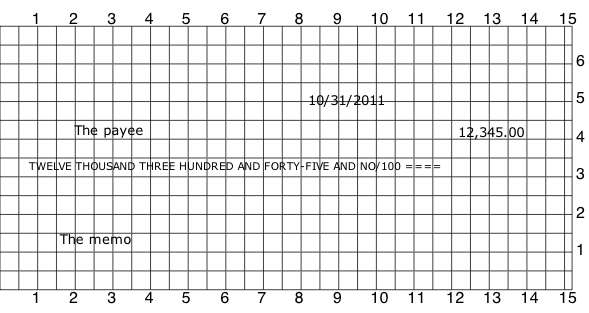
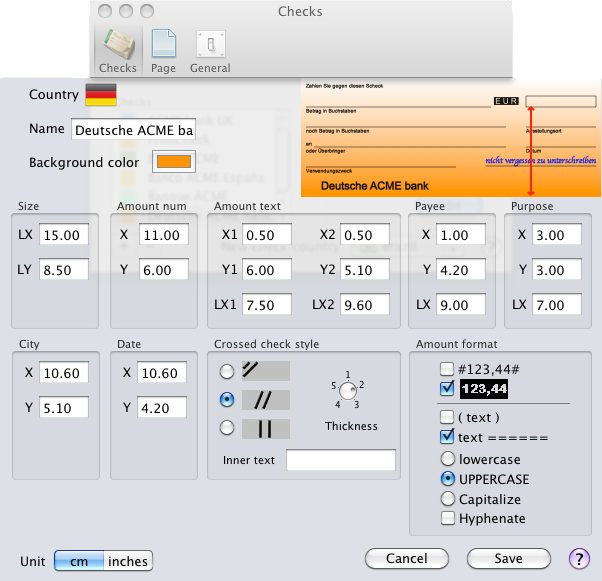
Adjust field position and size to match your real check.
Use a ruler in inches or centimeters to measure the actual fields on the check.
At the bottom of the window you can select the unit.
The reference point is the left bottom corner of the check.
As you "tab" from field to field, the check image will show what you need to measure
2 - Page configuration ------------------------------------------------------------------------------
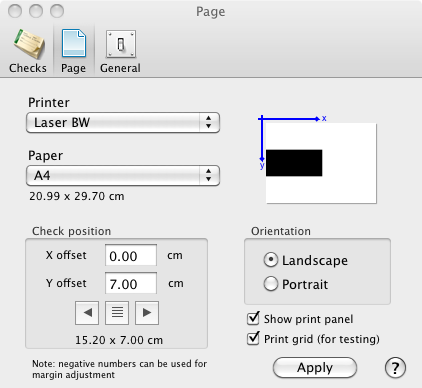
Click "Preferences > Page"
Set page orientation
Adjust the position of the check relative to the printed page
Depending on the printer, you may need to use a negative offset to compensate fot large printer margins
To help you with fields adjustments you can "check" the "Print grid" option.
Note: print a fiew checks on a blank paper with grid "ON" to adjust fields before using a real check. You can overlay your real check on the printed page against a light source to check if positions are OK.